
If you have recently made the decision to purchase a kids balance bike for yours or a friend’s child then we congratulate you on making a great choice of gift that will provide wonderful benefits to their growth and development.
A balance bike is a developmental powerhouse.
A little toy in which we here at ilovetoridemybike.com are extremely passionate about promoting to parents and carers as the go-to gift that will provide amazing physical, social, emotional and cognitive benefits for your child.
Quite simply, we love our bikes, and our goal is to bring you practical, contemporary and engaging information so that you can learn all there is to know about balance bikes for kids.
In this, our latest post we wish to provide you with a simple 3-step model that we call our Balance Bike Set-Up Guide.
You have already purchased the bike, but how do you correctly fit the bike to your little rider?
Well, in this article we wish to provide you with a simple model to follow that provides you with answers to that question. In our balance bike set-up guide, we will bring you the following information;
- Balance bike seat height adjustment
- Balance bike handlebar adjustment
- Balance bike support
- A word on safety and conclusion
As is our custom, we now invite you to sit back, relax and enjoy our latest post that provides you with a balance bike set-up guide that we hope you will find simple to follow and implement for your little riding champion.
*** Affiliate disclosure time: Some of the links on this page are affiliate links. If you click on those links and make a purchase within a time frame, we earn a small commission. Rest assured, the commission is paid by the retailers, not by you.
This commission helps keep ilovetoridemybike.com riding and writing. We thank you for your generous support. You are helping us continue doing what we love and that’s providing our customers with all the information they need to know about kids balance bikes.
First up, let’s look at the correct method to adjust a balance bikes seat height.
Balance Bike Seat Height Adjustment Guide
This is first in our balance bike set-up guide for good reason.
Correct seat height is numero uno when it comes to safe and fun riding. Your little rider will benefit with greater enjoyment, endurance, comfort and safety all by simply making sure their seat height is spot on.
By mastering this skill now and teaching your child this same skill as they grow, you are investing in helping to make their overall balance bike experiences rich with knowledge and fun.
But why is the balance bike seat height important for riders?
As we have already touched upon, seat height is #1 when it comes to rider safety and comfort.
But added to this is functionality. 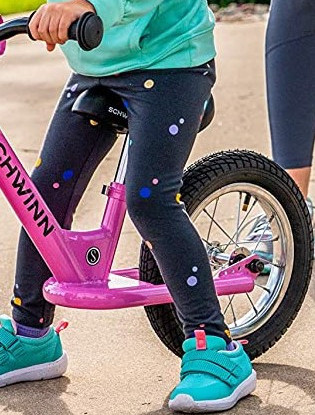
Your little rider, if riding a balance bike with the correct seat height, should be able to walk sitting in the saddle, feet resting flat on the ground with a slight (30 degree) bend at the knee.
They can then progress to walking faster or running with small glides, then longer glides and eventually extended glides with their feet positioned onto the bikes footrests as their balance, coordination and skill develops.
The key is to position their seat 1″ – 1 1/2″ below their inseam length.
Here’s a groovy way to do it.
Finding Your Child’s Correct Seat Height
First, we measure your child’s inseam. Yes, this sounds a little tricky, but we promise to keep this both unscientific and free from technical data 🙂

- have your child stand against a wall with their riding shoes on, feet slightly apart
- using a hardback book (you may wish for them to choose one of their favorites to join in on the bike fun), raise this with the spine facing upwards until it firmly touches the crutch
- keeping the book in this position, now measure from the ground to the top of the book’s spine
- this is your child’s inseam length
Nicely done!
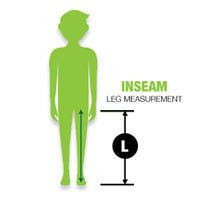 The correct saddle height is now determined by subtracting one, to one and a half inches from this height. For example, if their inseam is 12″, the correct seat height would be between 11″ and 10 1/2″
The last step is to measure the seat height on the balance bike and adjust accordingly.
Do this by simply using a tape measure, then measure the distance vertically from the ground straight up to the top of the mid-point of the saddle, so that this matches the correct seat height for your child.
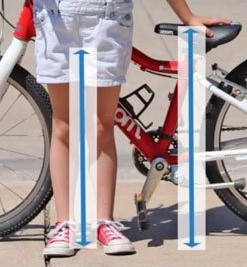
You’re all done! Now it’s time to adjust the balance bike seat height.
Correct Seat Height Adjustment
The hard work has all been done. So now it’s time to adjust your little rider’s balance bike seat height to the correct height you have just found.
Adjusting your balance bike seat height is usually very quick and simple, depending on your child’s bike design and model.
Adjusting Wooden Balance Bike Seat Heights
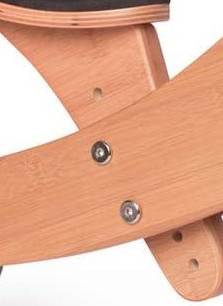
The trickiest of products will require a tool, such as an Allen Key to loosen and tighten the seats bolts.
These are usually found on wooden balance bikes such as;
- Kinderfeets (see Amazon USA or Amazon AUS)
- Wishbone 3-in-1
- rybike (see Amazon AUS)
- LifeSpan Kids Scout (see Amazon AUS)
- ANNADA (see Amazon USA or Amazon AUS), and
- Janod (see Amazon USA or AUS) balance bikes
If you’re unsure how to do this, please check with your bikes assembly instructions so that you can understand perfectly what you need to do.
This won’t take long, but we do recommend that you spend a little extra time and care now to ensure your fully aware of how to perfect and complete this masterpiece of bicycle mechanictry.
Quick Release Clamp Seat Adjustment
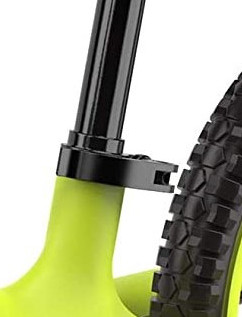
If your balance bike has a quick release seat clamp it will take you a matter of seconds to adjust your child’s balance bike seat height.
This list is not extensive, but some examples of balance bikes with this handy feature include;
- Cruzee
- Schwinn (USA) or (AUS)
- Strider (USA) or (AUS)
- Banana Bike (USA) or (AUS)
- GOMO (USA) or (AUS)
- Forgotten Rascal (AUS)
- KRIDDO (USA) or (AUS), and
- JOYSTAR (USA) or (AUS)
Using this clamp, unlock and simply move the seat up or down to your correctly found height. Then close the clamp to lock into position.
You are now a seasoned professional at the following bike mechanics.
- finding the correct inseam height
- calculating the correct seat height, and
- making the magical adjustments to your child’s balance bike
Next up, let’s look at handlebar adjustments.
Balance Bike Handlebar Adjustment Guide
This is the second most easily adjustable component of a kids balance bike and another that falls under (like seat height) a category that we call balance bike geometry. That being said, not all balance bikes have adjustable handlebars, such as that found on the Cruzee balance bike for example.
“great balance bike geometry matches the rider’s unique geometry”
We will not delve into the technical detail in this article, but essentially balance bike geometry covers the following elements: the bike frame, wheelbase, handlebars, seat position/height and fork angle.
The bike’s overall functionality, or rideability is governed by a combination of these elements working in harmony with a rider’s unique traits.
Basically, great balance bike geometry matches the rider’s unique geometry.
To keep things simple, let’s assume your balance bike’s geometry is pretty much spot-on for your child.
You have adjusted the seat height beautifully after measuring their inseam height and now all we need to do is adjust the handlebar height to finish our bike fit.
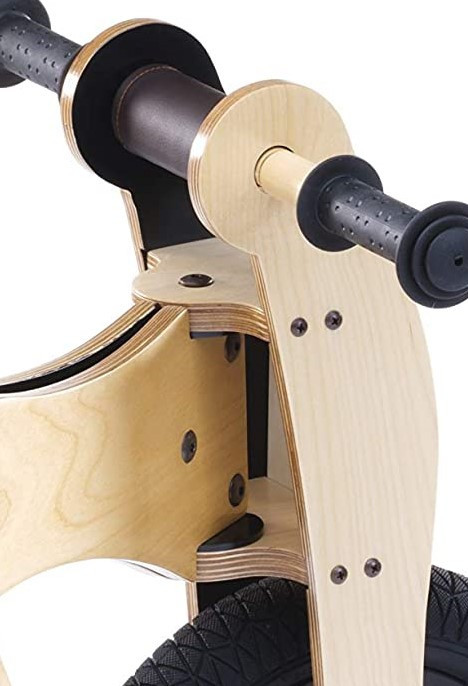
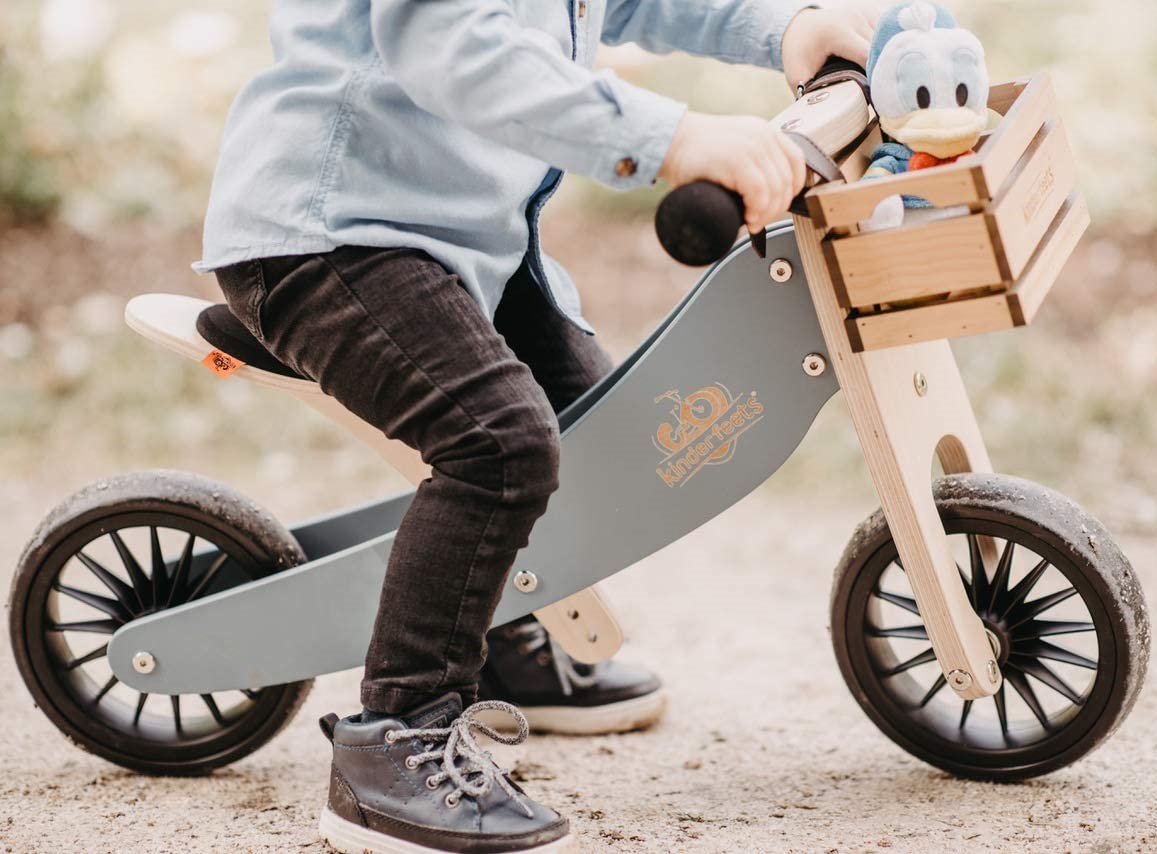
We just mentioned that not all balance bikes will have adjustable handlebars. Many wooden balance bikes and/or cheaper designs will have fixed handlebar heights (see example image below).
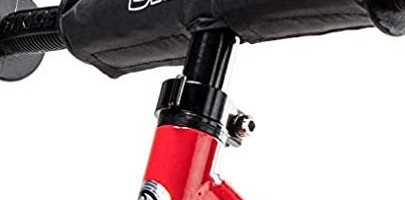
For designs that do have this very useful adjustment, you may again require an Allen Key tool to adjust one or more bolts, but hopefully your model comes with a quick-release clamp, such as those on the Cruzee, Strider, GOMO, Cub Toddler, Banana Bike, Kriddo Toddler, Trikestar and Schwinn balance bikes to name but a few.
Most models with a quick release clamp can be easily opened without tools, simply using your hands to open the clamp, adjust the height of the handlebars and then close the clamp again to lock into place.
Before attempting this adjustment, we always recommend that you check the bike’s assembly instructions so that your fully aware of the bike’s unique features and requirements so that you are following these correctly.
A little extra care and time taken now will reward you and your child significantly in future as they will gain greater enjoyment and safety with a correctly adjusted handlebar height.
So What Is The Optimal Handlebar Height?
If your child’s bike has this handy adjustment, the simple answer is this;
When seated, if you could draw a horizontal line from their hand position towards their body, this horizontal line should cross at their lower mid-section. Basically, 2-3cm above their belly button.
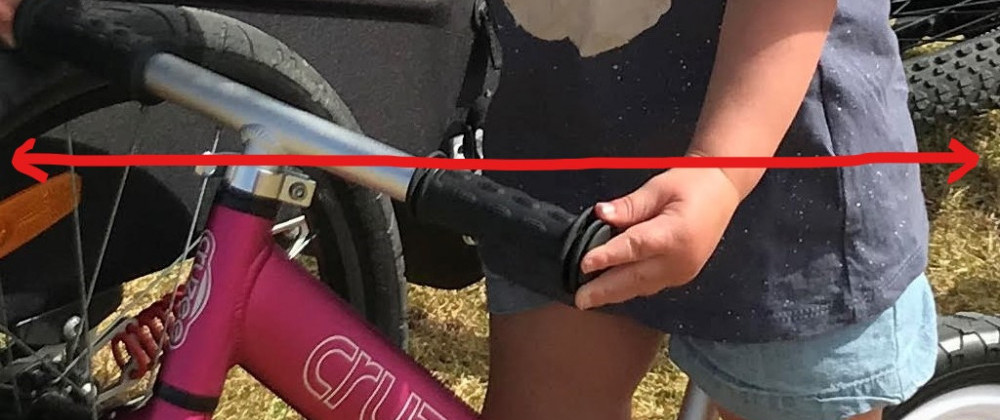
You will see that if their hand position is optimal, that is, in line with or lower than the child’s lower mid-section of their body, it provides the rider with the following benefits;
- their hand position is further from their body
- the riding position is less crowded as their arms are lowered and extended, and
- it allows for a more natural upper body forward tilt
Essentially, an optimal handlebar height makes for a more comfortable and enjoyable bike riding experience for the little rider.
Balance Bike Support
Luckily for us most balance bike manufacturers’ have simple, practical and easily accessible support available online.
By going to your balance bike manufacturers website, locate one of either the Support, FAQ, Instructions or Service and Information tabs (or similar) where you can find everything from FAQ, spare parts, assembly instructions, maintenance and fitting videos or warranty information.

Each manufacturer generally has done a great deal with regard to providing you with wonderful self-help manuals and videos so that you can confidently become a balance bike mechanical expert in your own garage using their resources.
We encourage you to absolutely check-out the manufacturers’ website first and foremost before attempting any bicycle maintenance or assembly on your own.
Essentially, they know their products. Their resources help you to become an expert in their products too!
If you don’t find the answers you’re looking for, be sure to contact us at ilovetoridemybike.com and we will happily help you and/or point you in the right direction so that your well covered. We just love to help our customers in any way we can.
A Word On Safety
As you have just made some brilliant adjustments to two very important components that make up a balance bike, we just want for you to be extra vigilant and encourage you to make the following checks before your child rides off into the sunset.
- check the seat and handlebar clamps or bolts are correctly fastened before riding
- check that the seat and handlebar height is not beyond the recommended maximum or minimum position. These are usually clearly indicated with markings on the seat and handlebar posts and are provided to ensure the rider is always riding in a position that provides optimal strength and comfort
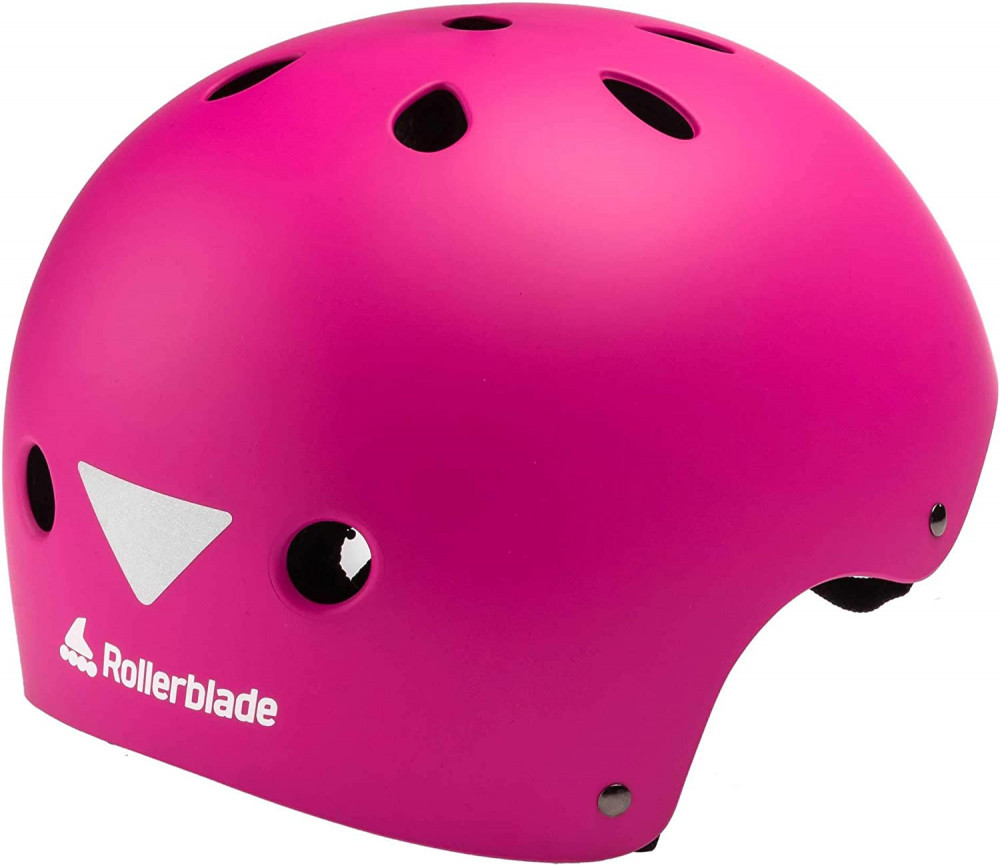
- before any ride, it’s a great habit to get into re-checking these clamps and bolts for correct tightness / fitting and of course, always ensure a helmet is being worn when riding!
Overall Conclusion
If you have read this far, we congratulate you on your due diligence.
Yes, really!
By engaging with our article you have now completed the following practical balance bike mechanics and have become more of an expert in balance bike geometry and fit for your child’s little bike. In essence, you have covered the following’
- you know why correct seat height is important
- you can confidently find your child’s inseam height
- you can confidently find your child’s optimal seat height
- you can adjust your child’s balance bike seat height accordingly
- you are aware of why correct handlebar height is optimal for riding and how to find it
- you can adjust your child’s handlebar height accordingly
- you are aware of where to find great balance bike support, and
- you are aware of some simple techniques to improve the safety of your child’s balance bike
Wow! We have covered a lot with you in this article and truly hope that you have found this simple to follow, informative and overall useful.
If you have any further questions related to this post or anything to do with all things bike we encourage you to leave your comments or questions below. We truly love to hear from you at ilovetoridemybike.com.
Happy and safe riding 🙂
This guide is very helpful in setting up balanced bikes. We had to research and look for this information after grandkids each received bikes for Christmas. Each of the three kids has not had a bike without training wheels, the oldest had a difficult time reaching the peddles of his bike and with your guide today, we finely got the setup right so he can enjoy his new bike. I just wanted to stop by and say thank you for the helpful guide.
Hi Jannette, that’s fantastic news. I’m so glad that our post was helpful to you and that your grandkids can now enjoy their new bikes!! Wonderful. They are such a great toy for so many reasons. We hope that you continue to follow us as we continue to provide as much helpful information about balance bikes for parents and carers in future. Thank you again for your positive feedback. Ride safe, have fun!
Thank you so much for writing this guide on setting up a balance bike. A few of my colleagues of kids who are just reaching the stage where they might start learning how to ride a bike and I thought a a balance bike might be a great gift idea. It sounds like different balance bikes have different adjustable features, though, and I’m not sure which one I should get. Do you have any balance bike recommendations?
Hi Kevin, thank you for your comments and questions.
We are glad you found this helpful. We are about to post within our next article a Balance Bike Buyers Guide. This will detail which balance bike would best suit your child’s needs. For example, the size frames available and tires come in different sizes.
There are really only 3 options. 12″, 14″ and 16″ tires for example. The frames basically come in these 3 sizes also. The youngest of riders need the smallest frames (such as a 2yr old rider) and the older rider needs the largest of these frames.
We do have some information already on our website which reviews the best balance bikes for 2022, see
What Are The Best Balance Bikes For Kids 2022? We Review The Top 5 – ilovetoridemybike
This will give you a great idea of what balance bike would best suit your rider’s needs. Have a read and see if this answers your questions. If you need some further help please reach out with your questions, we are hear to help you find the best balance bike for your child. Happy riding.
Setting up a balance bike for your child is very important. That way you know that the bike is right for them and they can safely use it. So this guide is very helpful for everybody that needs to set up a balance bike. Having the correct seat height will make for a far more comfortable ride, and give your child the confidence to use the bike, without fear of not being able to put their feet down.
How often do you suggest that one adjusts the seat and handle bar heights? Thank you.
Hi, thank you for your comment and questions. Yes, the set-up is super important for comfort and safety.
It really just enables the little rider to enjoy their bike experience more and allow their little bodies to correctly feel at ease on the bike too.
I would recommend adjusting every 4-6 months. By keeping a close eye on the markers that we suggested in our article (the 30-degree knee bend and horizontal line to the lower mid-section) you can quite quickly see when it is time to adjust these components.
We hope that you continue to enjoy our posts and for this to be helpful to your child’s riding experience. Safe riding!
I didn’t realize that balance bike manufacturers have exploded since my kids were little. It is really great that there are so many options now. The set up of the bike would be important for safety and comfort reasons…especially safety because our littles basically just learned to walk. Thank you for this article. It is good information regarding how to make sure the bike is set up properly for your kiddo.
Hi Kelly, yes there are so many options available for kids now. This can be a little overwhelming for parents as there are some great options, but also some to avoid.
We hope that you found this helpful. If you have any further questions at any time or require some guidance please reach out, we are more than happy to help you as we just love sharing our expertise and experience of all things balance bikes. Safe riding
I love that phrase – development powerhouse. Thank you for this detailed look at its set-up process. Mistakes with setting up your balance bike wrongly can be costly. Especially when it comes to the seat adjustment, clamps and bolts. They may look trivial, but some extra time spent setting the sits and tightening the bolts will save your child from accidents
Hi Parameter, yes bike set-up is key to young rider’s really enjoying their bike riding and being safe.
If you have any questions regarding this or any other query about all things balance bike, please feel free to contact me as I will be more than happy to help you. Thank you for sharing your experiences and comments.